Hi guys...I am back with an interesting post on installing OBIEE 11G on your laptop...
My laptop configuration:
OS: Windows7 64-bit
RAM : 4GB
CPU : Intel Core i3, 2.20Ghz
Minimum configuration needed for installing OBIEE 11G:
Disk Space(HARD DISK): 20GB or more
Available Memory(RAM): 4GB or more
Temp Space: 950MB or more
Swap Space: 3GB or more
CPU: dual-core Pentium, 1.5GHz or greater
Scenario:
I have Oracle 10g Database R2 32-bit and OBIEE 10g(10.1.3.4.2) 32-bit already installed on my laptop.I have to install Oracle Database R2 64-bit and OBIEE 11g(11.1.1.5) 64-bit on my system.
Only difference while installing OBIEE 11g on a machine already having previous versions of OBIEE installed is that we need to mention the port names during installation by choosing Enterprise installation.Rest everything is same as fresh install.
I upgraded my RAM to 4GB for installing OBIEE11g. Now i am ready to install OBIEE11g on my system.I am planning to install OBIEE 11.1.1.5 on my system.For this i downloaded the following from Oracle website.These are free versions as oracle license is needed only for test and production environments.
INSTALLABLES TO BE DOWNLOADED
1.Java (jdk-6u29-windows-x64 OR higher) 64-bit
2.Oracle Database (Oracle 11g R2) 11.2.0.1.0 64-bit
3.RCU (Repository Creation Utility) 11.1.1.5.0 32-bit.
Note: Run the 32 bit RCU and do 64 bit OBIEE installation .
RCU and 11g Installation are independent tasks. RCU Creates a Database
and Installation uses it. the common env between these two are only
database.
Note: All others except RCU must be 64-bit.If you are planning to use 32-bit Database then OBIEE also must be 32-bit.
4.OBIEE 11G (11.1.1.5.0) 64 bit
Now we are ready to install OBIEE
JAVA
1.Install Java jdk-6u29-windows-x64 .
ORACLE DATABASE
2.Extract the 2 zip files of Oracle Database (Oracle 11g R2) 11.2.0.1.0 64-bit to a common folder win64_11gR2_database. Note:Extract it to the same folder.Else while installing the database it will error out because some files will be missing. It comes around 2.12GB after unzipping.
reference links:
3.Delete all the oracle homes created previously to avoid confusion. Don't forget to stop all the Oracle and OBIEE related services before deleting the previously created oracle homes.
4.Start installing Oracle database by clicking on the setup
5.Select the options as shown below
Give the Global database
name.I gave database name as orcl5 and password Admin123.This name will
be later used by OBIEE and RCU to connect to this database.So remember
this.
All the remaining fields can be kept as default.If you want to change the Software location
you can change it.Here i have changed the default software location of
dbhome_1 to dbhome_5 because i already used the other home when i tried
to install the same database previously.
Click Next
Ignore this error.It is not relevant in this case.
Click on Password Management to unlock the schemas and change the password of the schemas.
I unlocked all the schemas and gave the password as sys for all schemas. This is not recommended in real practice ,but since i am installing it for personal use it is ok.
Oops..error..Ignore the below error.It is because the password sys which i gave is weak.
Installation of Oracle 11g R2 database is over.
Check the TNS file for information about the installed database.
TNS Path: C:\app\user\product\11.2.0\dbhome_5\NETWORK\ADMIN
Note:dbhome_5 is the home directory name given by us during database installation.
Now we will run the RCU.
RCU
6.The RCU is simply the "Repository Creation Utility". Simply put,
the RCU lets you install certain schemas in a database that are required
by Fusion Middleware products like Oracle BI EE. These schemas can be
installed onto any certified version of database like Oracle Database,
IBM DB2, or Microsoft SQL Server. There are schemas that are required by
the core components of Oracle Fusion Middleware, while there are
schemas that Oracle BI EE requires, like for the Scheduler, for BI
Publisher, for the new Scorecard product.
Unzip the downloaded RCU to a folder.
Navigate to the rcuHome\BIN folder and run the rcu.bat file .
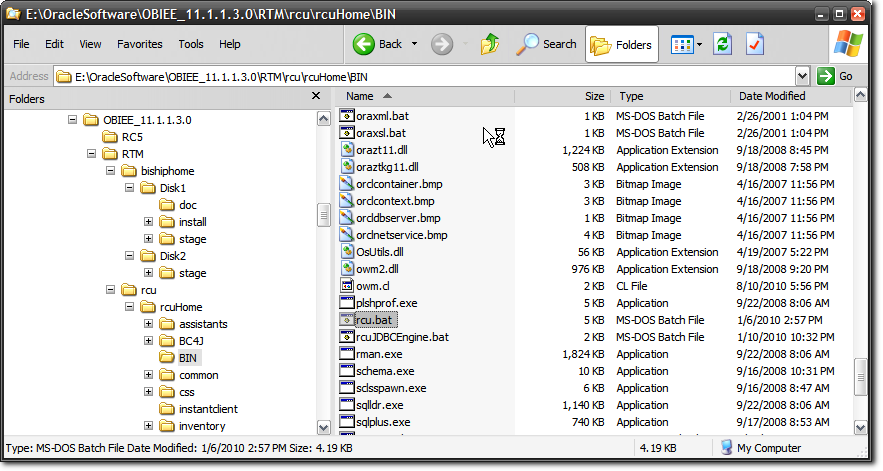 |
| The rcu.bat file to be run on a Windows machine |
Select "Create" from the option radio-button, and click "Next".
Here you can select an Oracle Database, or click the dropdown to select another database. I will use Oracle Database, obviously.
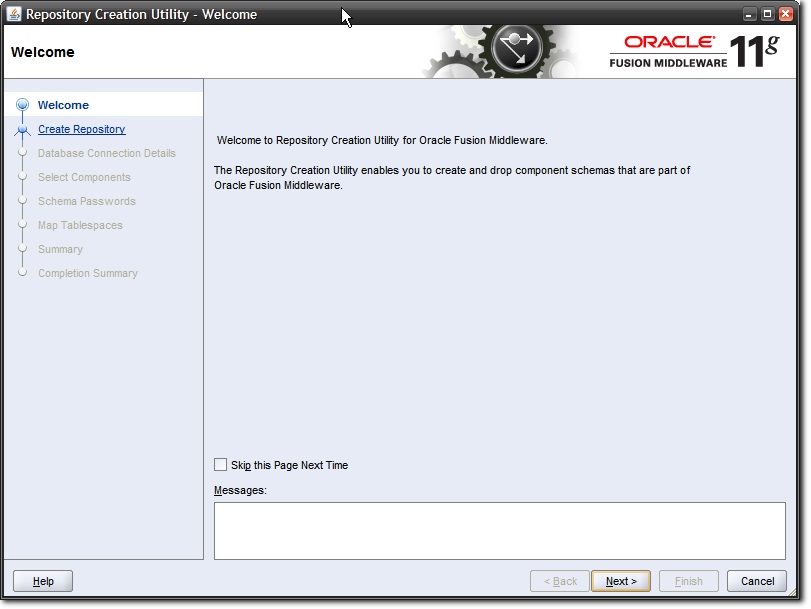 |
| RCU Welcome Screen |
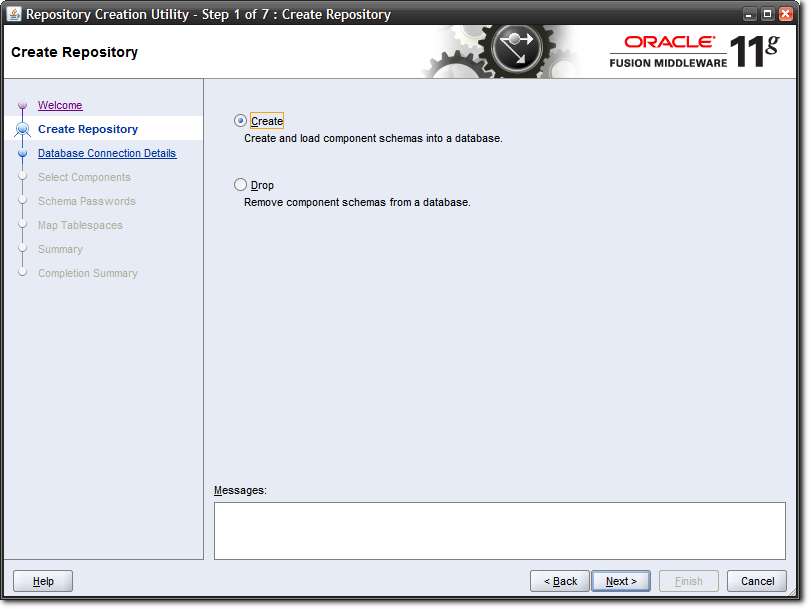 |
| Select the "Create" option |
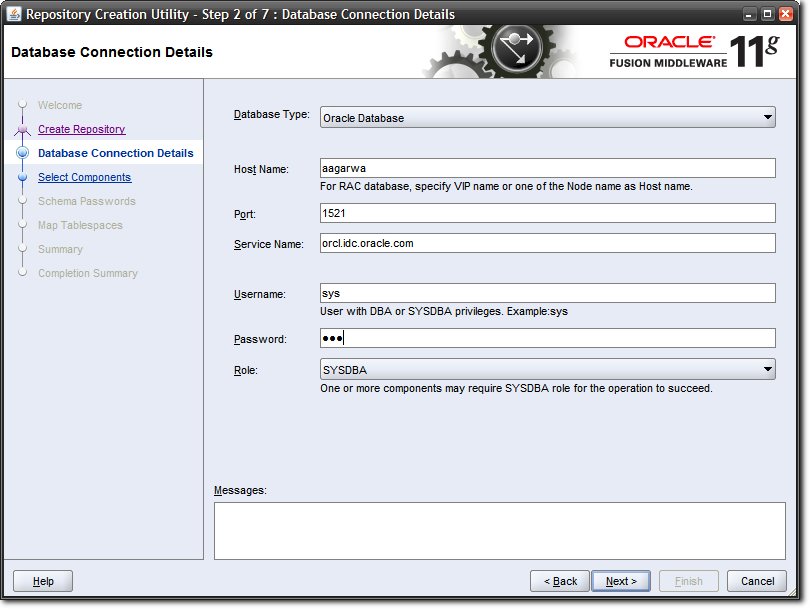 |
| Enter the details where your Oracle Database is running |
Host Name: Name or ip of database server
Port: It is by default 1521 provided by oracle for oracle database.
Services Name: Check the service name of your database in tnsname file and give it to service name field.
User name & Password: provide the User name & Password which has dba privileges.
Role: select Role depends upon the user you have given.
Error i encountered here :
Incorrect service name.
Reason: I gave the port number incorrectly.
Correction: Give the details as mentioned in the TNS entries
TNS:
Note : I have used the port number as 1522 here because i already have a Oracle 10g Database installed in my system which has port number 1521.Hence the new Oracle 11g Database which i created will have the port number 1522.You can verify this from the TNS entries.
The below error can be ignored.
Two metadata repositories are required:
- the Metadata Services (MDS)
- And Business Intelligence Platform (BIPLATFORM)
Select Metadata Services and Business Intelligence Platform only.
Component Detail ->Select the Oracle Business Intelligence Component. This action automatically selects the Metadata Services (MDS) schema (under the AS Common Schemas group), which is also required by Oracle Business Intelligence.
8. Schema Passwords -> Use Same Password for all schemas.I used sys as the password for both the schemas.
9.Map Table space
After the schemas are created with no errors, the Completion Summary screen opens. In the Completion Summary screen, click Close.
Congratulations!!! Now you have metadata schema required fro OBIEE installation.
Sort of a post-wrap exercise may be, for those so interested, to launch
Oracle SQL Developer, and peek a look at what sort of tables are created
by the RCU.
If you choose to do so, this is what you would see.
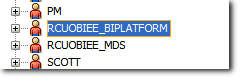 |
| Schemas created by RCU for OBIEE |
The "ANNOT*" tables are used by the Scorecard product.
"QRTZ*" tables are used by BI Publisher, "CALC*", "HSS*" by Essbase and Oracle Hyperion products.
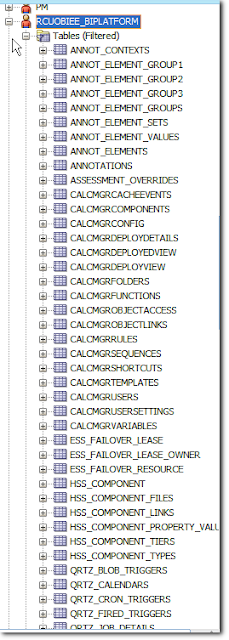 |
| Tables in the RCUOBIEE_BIPLATFORM schema |
10. Now that we have created RCU we will go forward with installing OBIEE 11G.
OBIEE
I have OBIEE 10G already installed on my system.I would like to install OBIEE 11G without uninstalling OBIEE 10G. I found the below posts useful for this:
Below are the steps i followed for installing OBIEE 11G.
1.Extract the obiee11g setup.Run the installation setup from Disk 1.
The below screen appears.Follow the screen-shots given below.
Select Enterprise install because in this install type there is a option to mention new ports.If we don't do this way the installation will over-write the previously created ports for OBIEE 10g.
Note: I am installing OBIEE 10g and OBIEE 11g on the same machine.Hence i will have to give new port names for OBIEE 11g because the default ports have been used already by OBIEE 10g.
Note: If i am doing a fresh OBIEE 11g installation i will go for Simple Install.
Follow the screen-shots given below.
Here we can specify a user name and password.Unlike OBIEE 10g where the user Administrator used to have all the administrative privileges , in OBIEE 11g we can specify the name of the user who will have Administrative rights.The user name will be weblogic by default.We can change it to any desired name.
The option Scale Out BI System will be used for vertical clustering which is not required here.
Next step would be to give Oracle Middleware Home Location. Click Browse and select any location.
OBIEE11g will be installed into this location.The remaining fields will be populated automatically once you select the Middleware Home path.
Ooops..i got the below error..no problem..click Yes if you get the same error...
Just click Next and keep going...
Wow...now is the time you have to enter the name of the 2 RCU schemas DEV_BIPLATFORM and DEV_MDU we created earlier.
Also mention the connection string in this format
hostname:portname:servicename
Note here i have used the port 1522 instead of 1521.This is because i have already installed Oracle 10G Database in my system.Hence when i installed Oracle 11G Database it has a new port associated with it ie,1522. We can get these information from the TNS file.
Path: C:\app\user\product\11.2.0\dbhome_5\NETWORK\ADMIN
Now time has come to mention the port name. The default ports have been used by OBIEE10G which we installed previously.We need new port names for OBIEE 11G. For this we need to upload a .ini file containing these port names.
Download the file from the below location:
Just click Next and keep going...
Click on Install and it will start installing OBIEE.
Wait almost 2 hours...don't put your laptop in sleep mode...
Oops...got an error...error is starting opmnctl coreapplication_obips1 failed...ignore this error...click next..
Wakeup guys...hope u didn't sleep..it took around 3 hours for the OBIEE installation to complete.
Now we will try starting OBIEE and playing around with it.
Step1: Click Start BI Services
Oops i got an error in command line...unable to get file lock..
Note: I ran into this error the first time I restarted Weblogic on one of my installs…
Note: We got the above error because the file is locked.So we will have to
go to the path and delete the lock file so that we can start the
presentation services.
Navigate to the path : <OBIEE HOME>/C:\Middleware\user_projects\domains\bifoundation_domain\servers\AdminServer\tmp
and delete the “AdminServer.lok” file .
Reference:
Wow..its done...now we can start enjoying OBIEE...
Type the following paths:
Component
|
Web link
|
Presentation
|
http://machine_name:7001/analytics
|
Enterprise Manger
|
http://Machine_name:7001/em
|
Weblogic(Console)
|
http://Machine_Name:7001/console
|
In my case paths were different as my ports were different. I have to give the port names i gave during installation.
|
Component
|
Web link
|
Presentation
| http://user-VAIO:8704/analytics |
Enterprise Manger
|
http://user-VAIO:6001/em
|
Weblogic(Console)
|
http://user-VAIO:6001/console
|
Enterprise Manager:
Presentation:
Weblogic Console:
Till next time...bye.. :)
Don't forget to put comments below.Your feedback and doubts are valuable.


